Blender: Create a Fashionable Female Short Hairstyle! So Cool!
Blender: Create a Fashionable Female Short Hairstyle! So Cool!
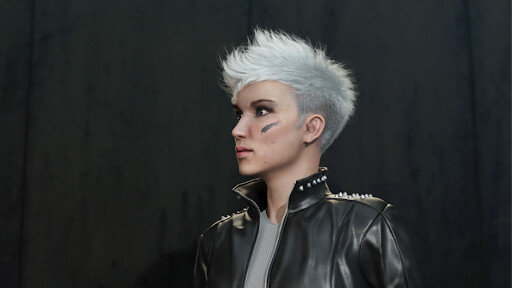
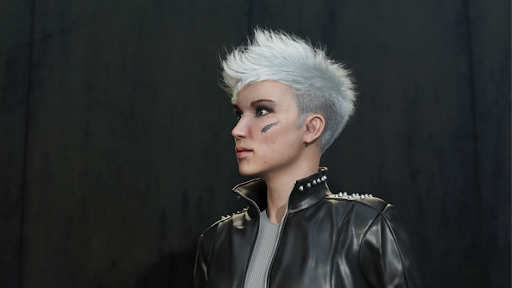
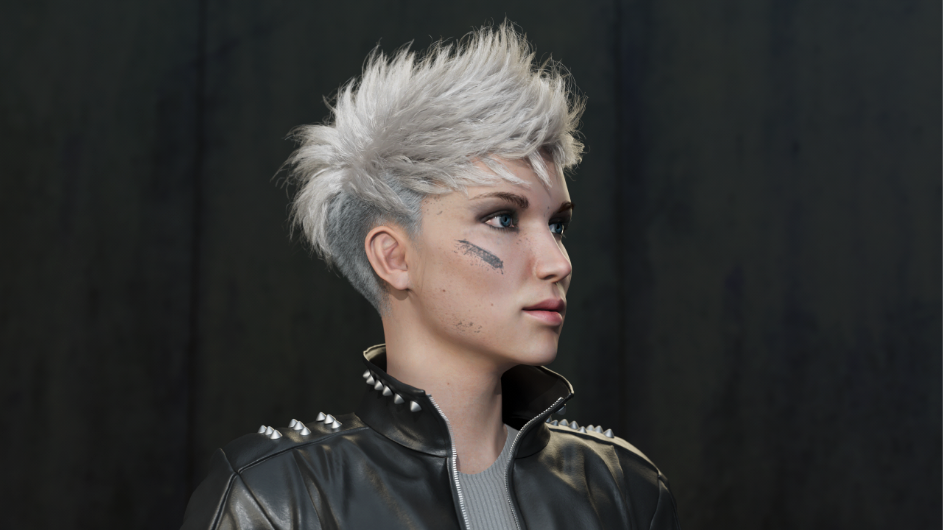
Short hairstyles for females have become a fashion today, we can find a variety of cool and pretty-looking short haircuts. I'm always excited to see those cool haircuts, they were inspiring me to create some work. Then I decided to share this short hairstyle case with you all, in this tutorial, I summarized a few bullet points on creating such hairstyles, I hope it will help those who want to create similar hairstyles.
Tools
I'm using an add-on called 3D Hair Brush which is based on the particle system in Blender, it offers plenty of hair presets and brushes to users, as well as layer management and modifiers. I'll talk about what is used in this case.
Analysis
Before we get started, we always need to study and analyze the case. Except for the basic things such as the direction of hair, the outline, shape, etc, what’s more important is to grab the characteristics of hair, so as to determine the workflow and method.
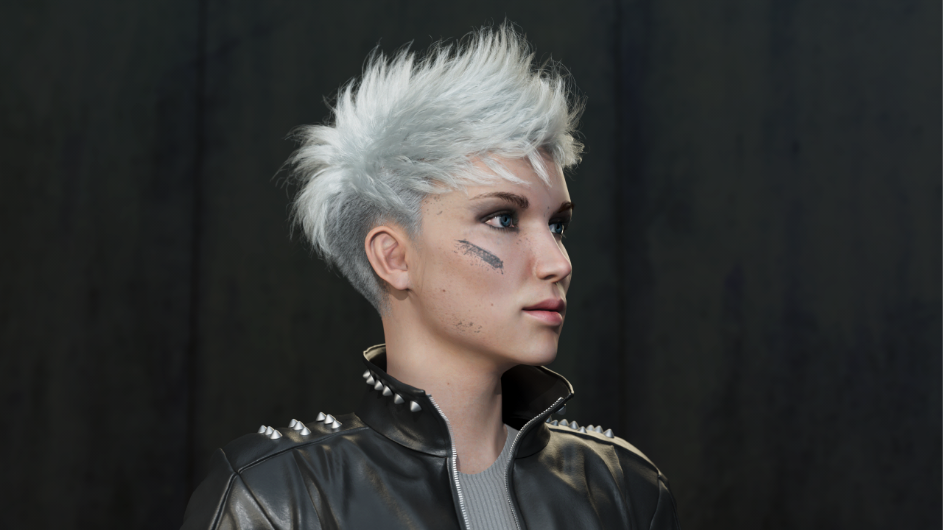
Take this hairstyle case as example, the hairs are separated into two areas: short and long, so we can create two layers for changing the direction and shape.
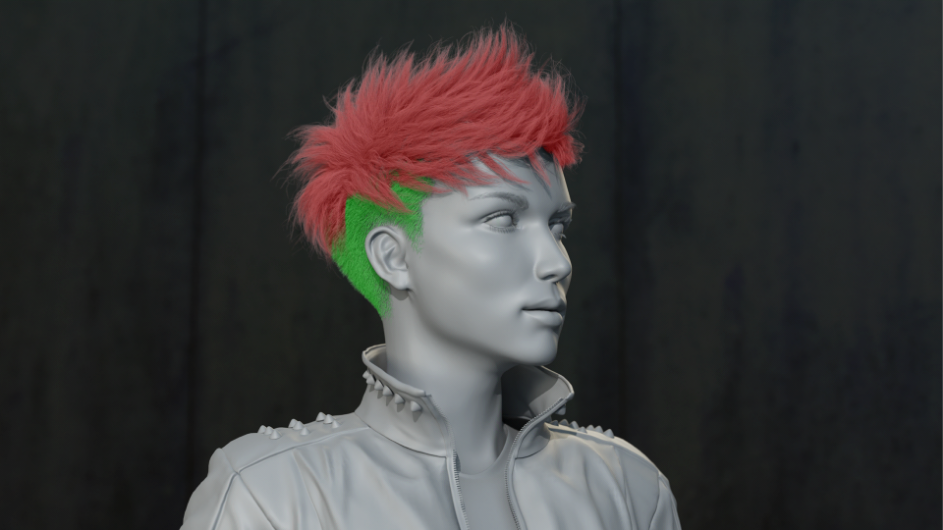
Short hairs are simple, we’ll skip this part.Let’s focus on the long hairs. From the final result, we can see the hair is fluffy with slight randomness. The long hair forms clumps, and there is parting and randomness. The clumps are apparent, while the separation and randomness are weaker, so we can be sure the characteristics of this hairstyle is clump.
After we find the characteristics, now it’s time to do a deeper and more detailed analysis: the quantity of clumps, the size, the density, etc.
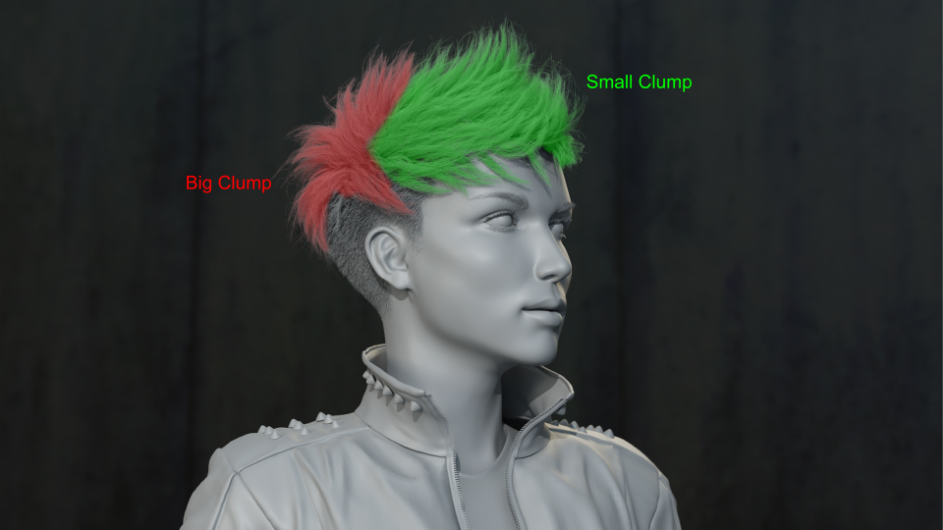
We can see the large clumps of long hairs consist of more small clumps, mingled with random clumps. When we are creating clumps, we can shape them by changing the direction and the options in the clump modifier.
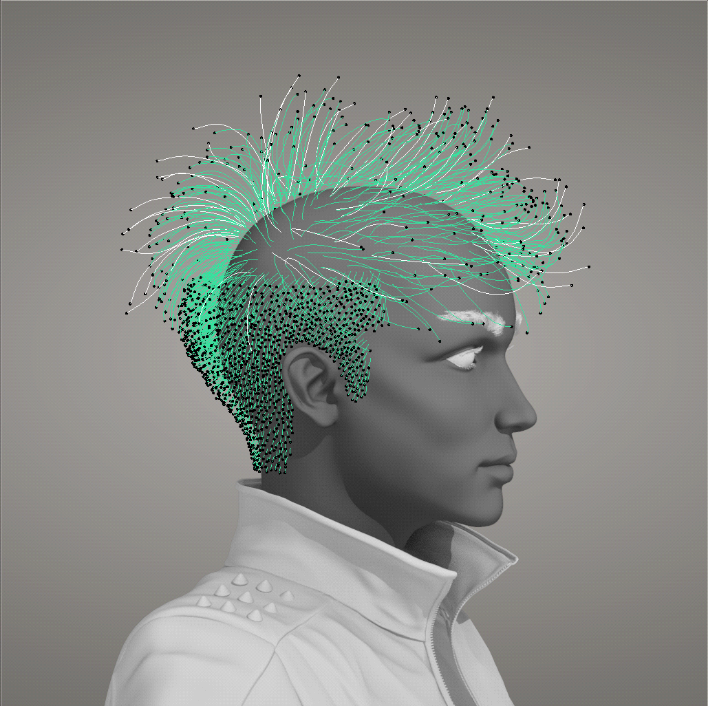
In addition, when we are analyzing the direction of hairs, we can do it in two steps: To analyze the overall direction, and then the details. This will make our later viewing and creation easier. When we are analyzing the overall direction, we just need to mark the general direction of hairs, and the details can be marked separately.
Overall Direction
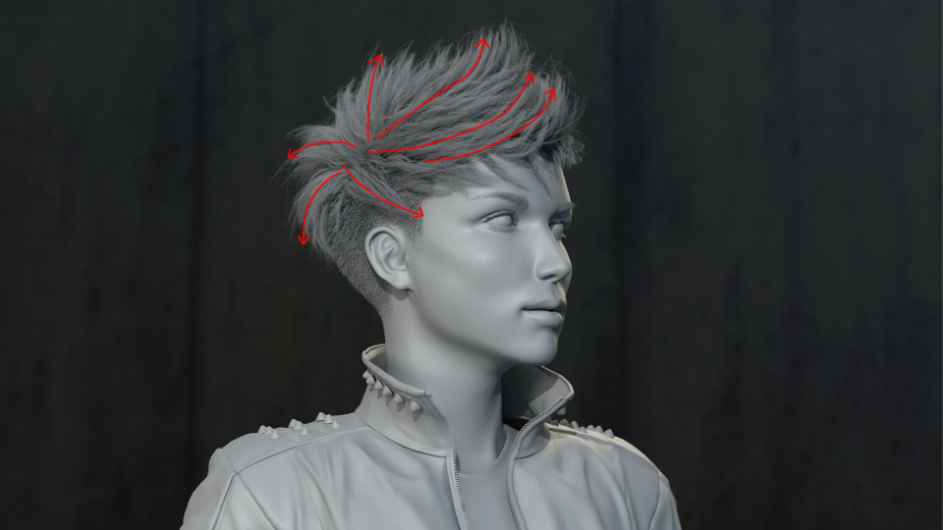
Details
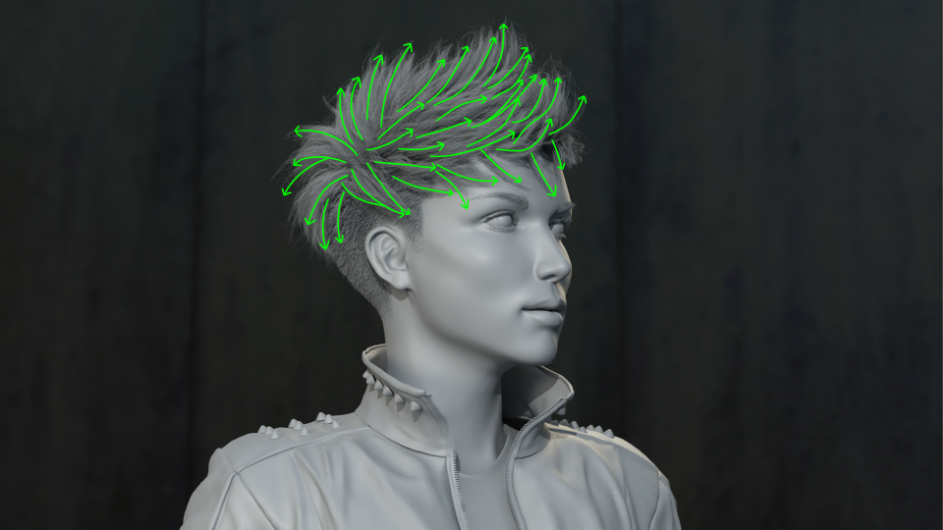
Direction of Hairs
Before we start creating the hairs, I’d like to share my best practices with you.
- A proper quantity of guidelines: The quantity of guidelines plays a great role in creating clumps, it represents the quantity of clumps you are going to create, so the more clumps you need, the more guidelines you should create. The guidelines also determine the details of the hairs, the more complex the direction is, the more guidelines are needed.
- Hair Mirror: Delete half of the hair, and apply Mirror to simplify your later steps.
- Less segments: Set less segments to make it easier to control the overall direction of hair. With more segments, it can be difficult to change the overall direction of the hairs.
Four Steps to Change the Direction
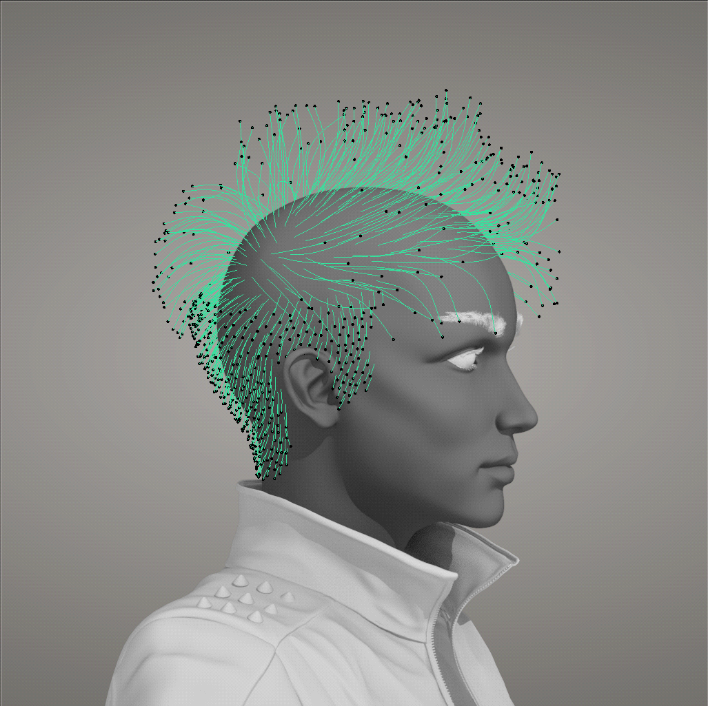
- Determine the Overall Direction
When we are creating hairs, we need to first make sure the overall direction is correct so we don’t re-create anything later. In this step, we don’t need to consider the steps of the hair, or the detail direction and other details.
Determine the length of guidelines before sculpting the hair, and then we can start sculpting. It may differ when you deal with short hairs and long hairs. Generally, we use Comb brush on the long hairs, and the guidelines should be fluffy, they shouldn’t be too close to the surface of the model. The short hairs, however, are basically sculpted with Orient brush, as long as the overall direction is correct, we can adjust how fluffy the hairs are later.
Demonstrations
Overall Direction
2. Work on the characteristics
After the overall direction is completed, we can add some details. First step is to emphasize the characteristics of the hairs, now we can see it’s the clumps, and the direction also varies, and parting is obvious, too. So we can get started.
Clumps: Use Attract brush of 3D Hair Brush, we can select a strand of hair, and use Attract brush, we can soon get a fine effect and this saves us a lot of time.
Demonstration
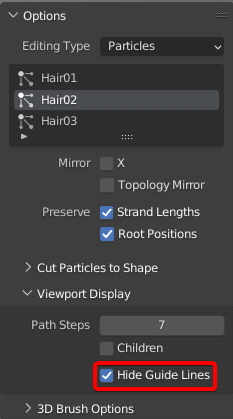
Tip: Enable Hide Guide Lines in N-panel, and hold H to hide the unwanted guidelines, this is useful when we are sculpting only a strand of hairs.
Parting: To achieve what we want, I just use Part brush of 3D Hair Brush to create a parting effect, and then use Comb brush to adjust the details.
Demonstration
Spiral: I use Orient brush, and enable Repel to create this ray-shape effect, and then use Twist brush to change the direction. Finally, we get a smooth transition between spiral shapes and other parts.
Demonstration
Characteristics
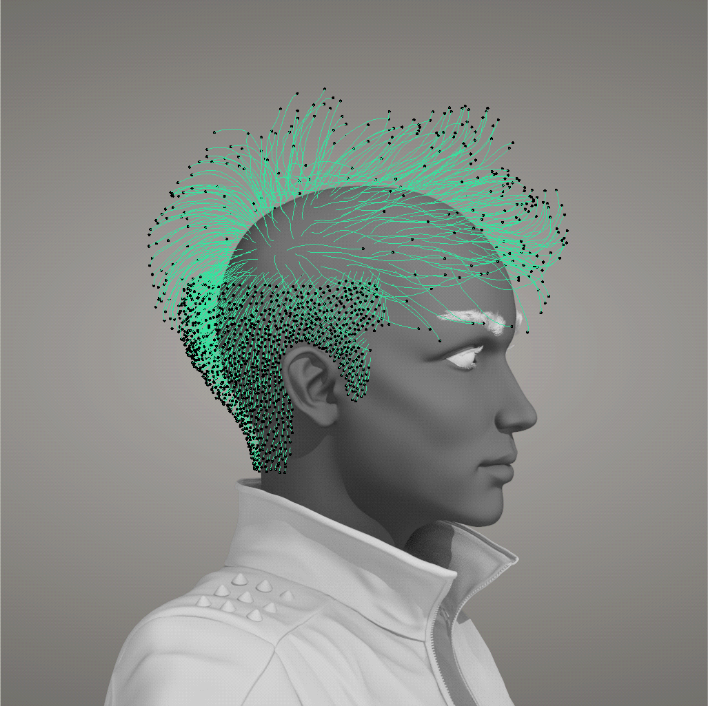
3. Details
When we are finished with the direction, we can start to add details. Add some random long hairs to break the edge of other hairs, we add these hairs with Draw brush, and then sculpt them slightly. Besides, we can also tweak the existing guidelines, use Noise brush to add some noises to each guideline.
Demonstrations
Details
4. Post Modification
Now the directions of all hairs are done, I notice that the hairs on the top are heading upwards too much, they are too fluffy which breaks what we decided in the beginning. So I decided to lower the direction to improve this. But we have a problem now, the direction is done, if we sculpt the hairs with Comb brush, it will break all the details we just added, then our previous efforts will be wasted. So I choose Orient brush of 3D Hair Brush to deal with it, the Orient brush doesn’t break any detail while changing the direction of the hair, so we can fix this quickly. Kind reminder here, we really should be careful with the overall direction, avoid any change in later steps.
Demonstrations
Shape
After the direction is done, we can start with the shape. When adjusting the shape, 3D Hair Brush offers some modifiers which really helped me a lot. And I choose Simple as the children of hairs.
According to our previous analysis, we need to first adjust the overall effect of clumps. We can use modifiers of 3D Hair Brush, add a clump modifier to control all the clumps.
Final result
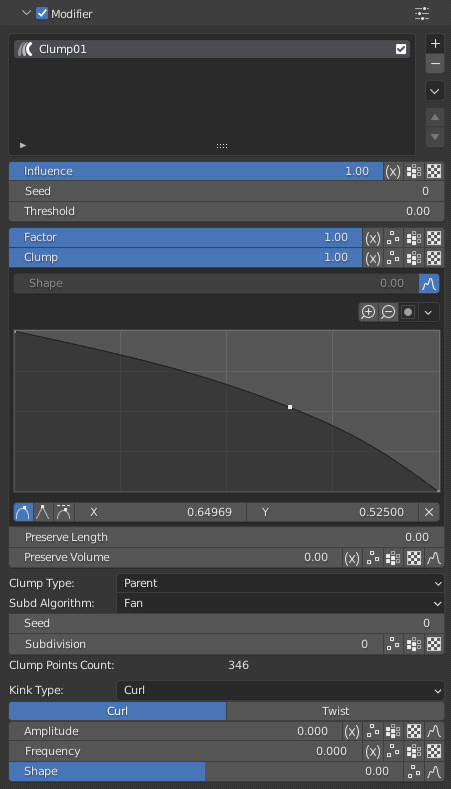
After the overall effect is done, we need to tweak each clump further. The large clumps consist of more small clumps, so we can add another clump modifier with more clumps than the previous one. Below is a screenshot of the options.

Final result
After clumps are done, let’s add randomness. We can do this with two layers, one with weaker randomness of all hairs, the other with stronger randomness, but less hairs
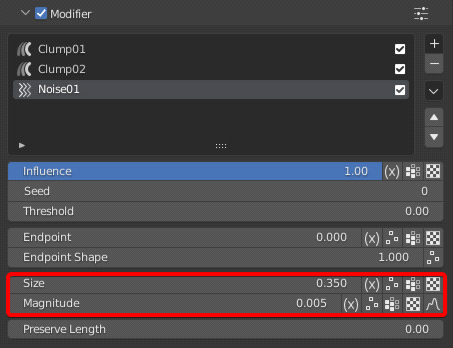
Second layer
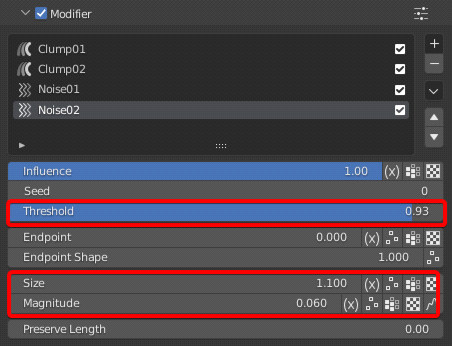
Final result

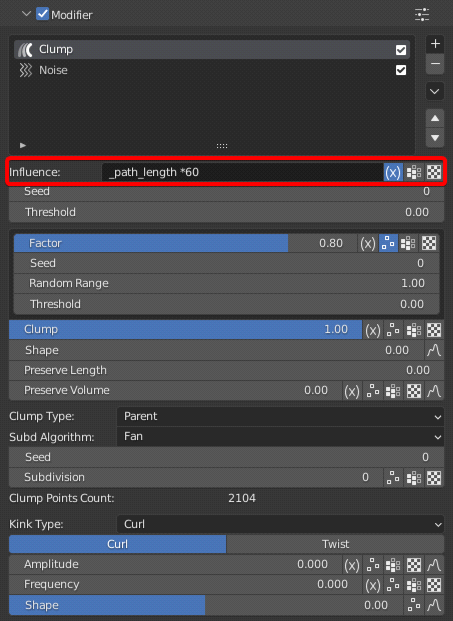
Next, I want to add some even smaller clumps, add a clump modifier and change the subdivision to a higher value, then set the amplitude and frequency of the curve, and we can enable Random of amplitude and frequency to make the hairs random. At last, we can set a larger threshold. Now the detailed clumps are done.
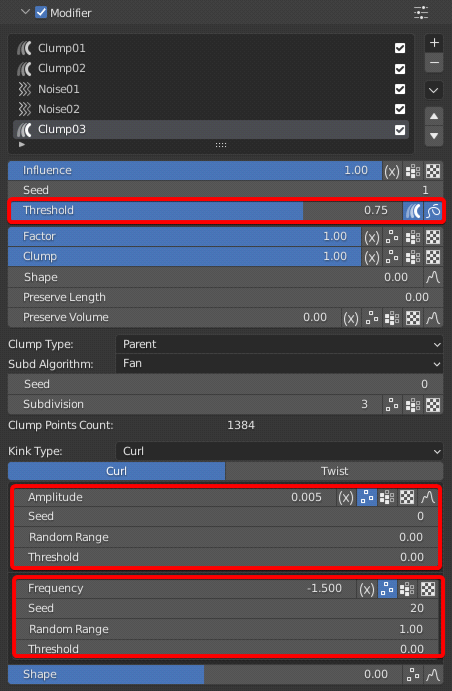
Final result
Short hairs are easier to create, here I add clump modifier and noise modifier, set proper values of options. I also use the expression here, we can make the hairs have different values according to their different lengths, so as to quickly add smooth transition between short hairs and long hairs.
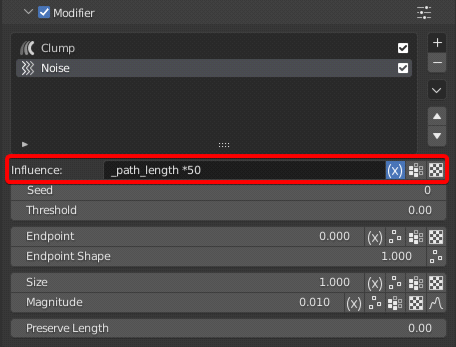
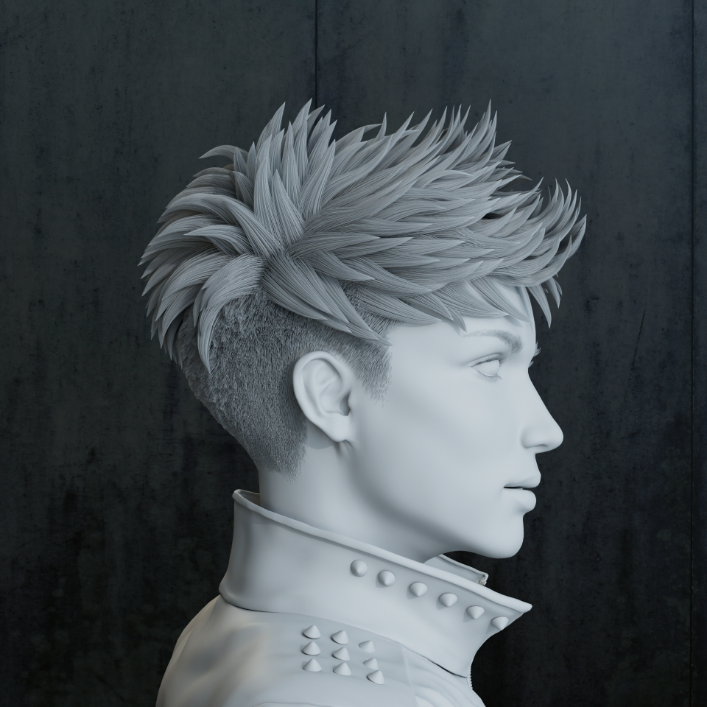
Final result

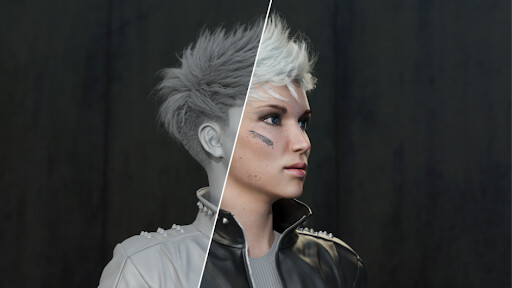
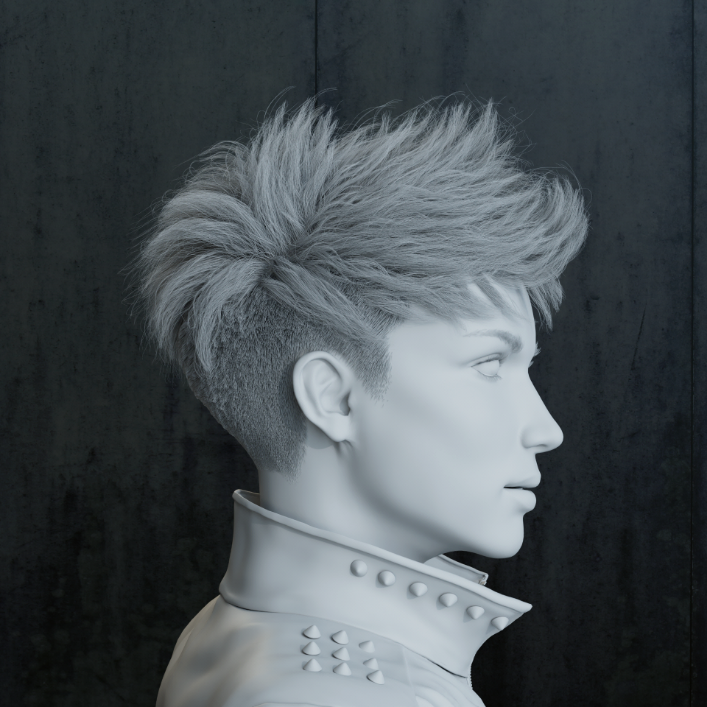
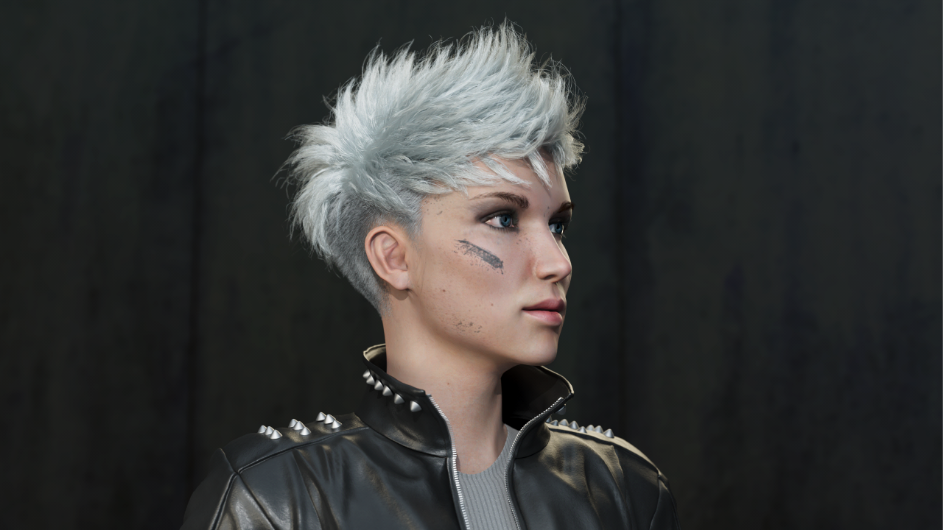
Completed hairstyle
Create material
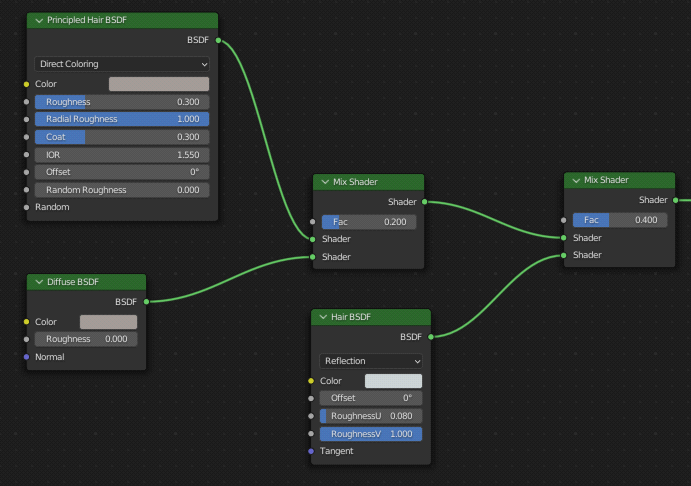
I use Transparent and Light Paths nodes to adjust the white material. Basic nodes can be adjusted with principled hairs and diffuse reflection, principled hairs take the most part and make the color warm.

Now the highlight is not ideal, we can mix hair nodes, and the coefficient of hair nodes can be less, the color of the hair highlight will be cold.
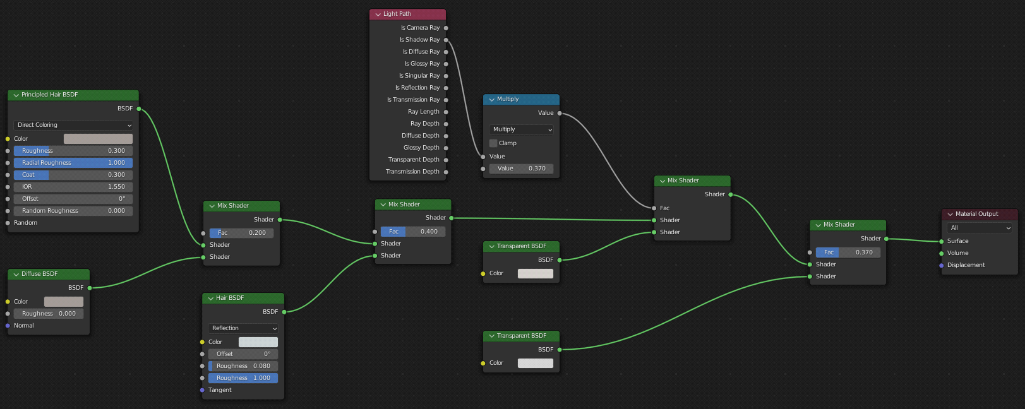
After adding highlight, the material seems hard, now we need Light Paths and transparent nodes, Light Paths reduces shadow of hair, and transparent makes the hair softer.
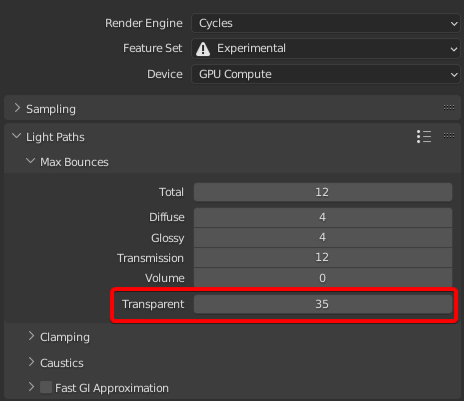
Tip: If you are using a transparent node, you should increase “Render Properties->Light Paths->Max Bounces->transmission” where there are a lot of hairs. Render speed can be affected by this value.
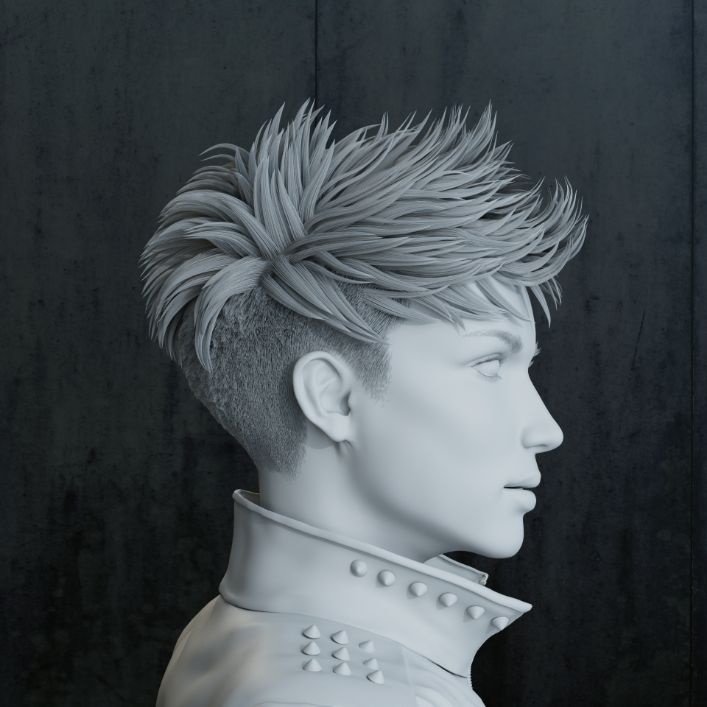
Final result
Summary
1. In analyzing stage, make sure about the characteristics of the hair and the effect we want to achieve. For example, create different layers according to different shapes, and sort the priority of hair shapes according to the their different effects.
2. When creating the direction, we need to have a detailed workflow, starting from overall direction to more detail at the end.
3. When creating the shape, we need to focus on the characteristics, and the sequence should conform to the previous analysis, from the characteristics to more details, thus we can ensure the characteristics is well represented.
We are done here. I'm quite satisfied with this effect, and I hope it will help you. Thanks for reading, see you next time.

I do believe all the ideas youve presented for your post They are really convincing and will certainly work Nonetheless the posts are too short for novices May just you please lengthen them a little from subsequent time Thanks for the post
I loved as much as you will receive carried out right here The sketch is tasteful your authored subject matter stylish nonetheless you command get got an edginess over that you wish be delivering the following unwell unquestionably come further formerly again as exactly the same nearly very often inside case you shield this hike
Hello! I’m glad you like it. We will gradually improve, and we appreciate your suggestions and support.
Hello! You can contact us by email, this is our email address vfxgrace@gmail.com