
Realism in Blender Hair with Variegated Textures
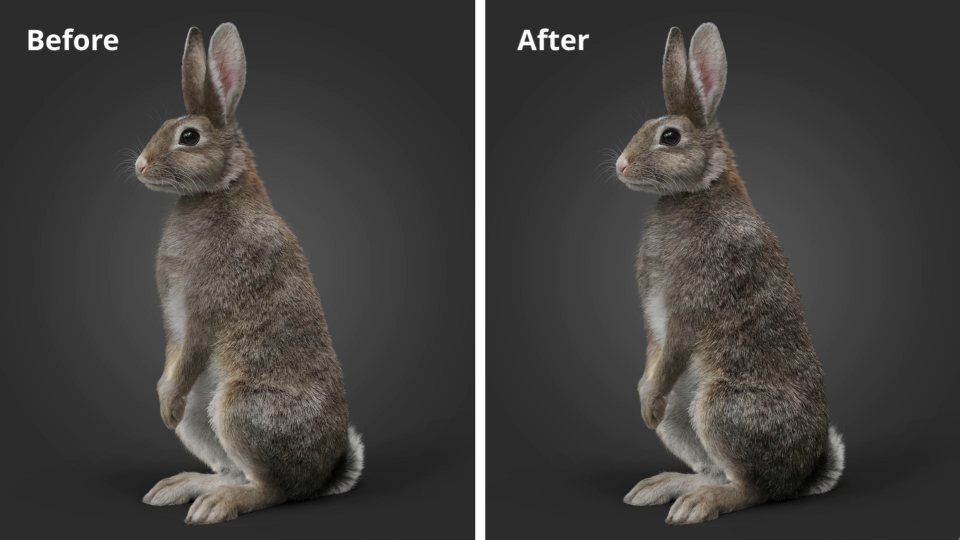
In this tutorial, we'll explore how to enhance the realism of hair in a real case using variegated textures, employing Blender's built-in variegated textures to add detail to our models. Below is a video illustrating the difference between hair without variegation and hair with variegation. The comparison clearly shows how the variegation affects hair realism.
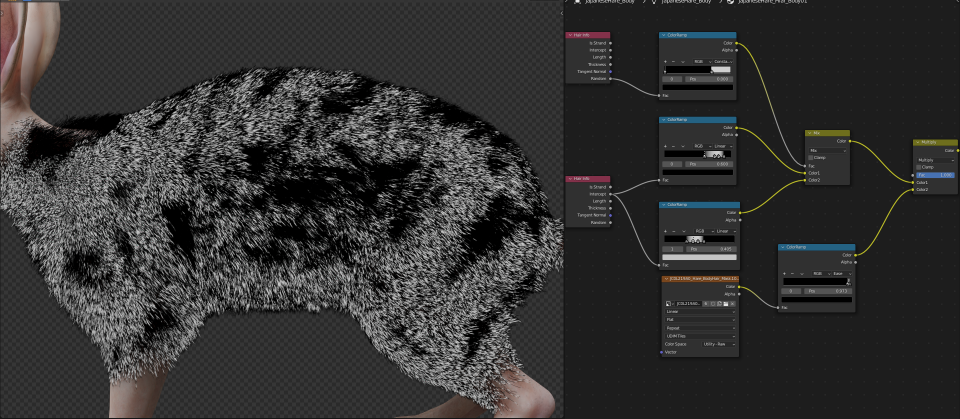
Before diving into the tutorial, let's look into the types of variegation depicted in the example images. There are several types of variegation: "Single Hair Variegation", where a single hair displays multiple color changes; "Random Variegation", where the overall hair shows variegated changes, but the intensity varies across different areas. For example, the variegation on the body is less intense compared to the hind legs, which is achieved by combining masks with variegation; Another type is "Adding Depth", which darkens colors to simulate shadows between hairs, so as to add depth.
Methods to Add Variegation:
Adding Depth:
1. Use "Intercept" in the "Hair Info" node to add depth to hair, add a "ColorRamp" node as the "Fac" of a "Mix" node, using "Color2" of "Mix" for the tip color, and "Color1" of "Mix" for the root color, and darken "Color1" with "RGB Curves."
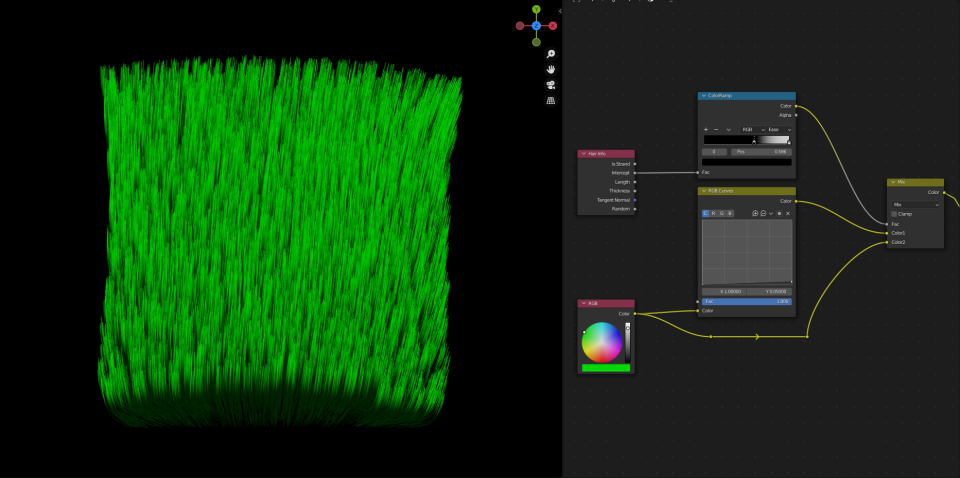
2. Increase hair depth with "Random" of "Hair Info", add a "ColorRamp" node to "Random" as the "Fac" of a "Mix" node, and darken the color map with "RGB Curves" to introduce random color variations.
Random Variegation:
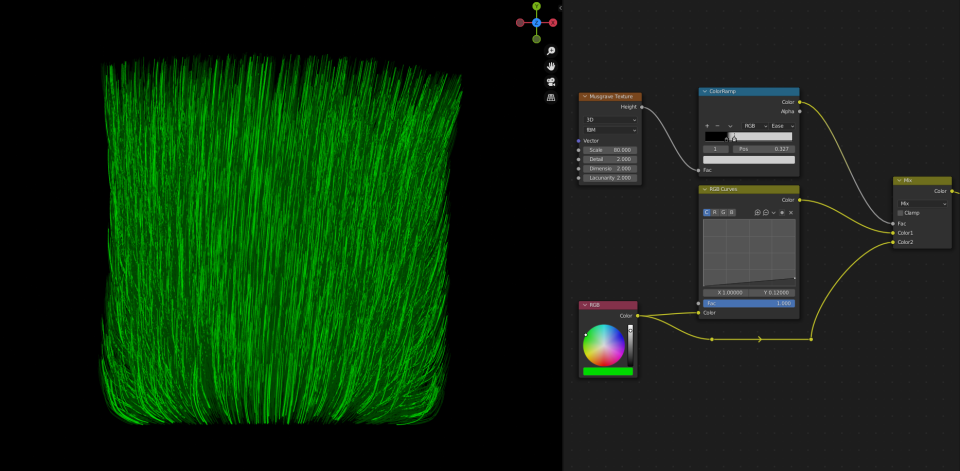
1. Mix multiple "Musgrave Texture" nodes to create more random variegation. First, add a "Musgrave Texture", increase the value of "Scale", and enhance the black and white contrast with "ColorRamp"; then add another "Musgrave Texture" node, reduce its "Scale", and mix both "Musgrave Textures" nodes, then change the "Mix" mode to "Multiply", and adjust "Fac" to tweak the variegation.

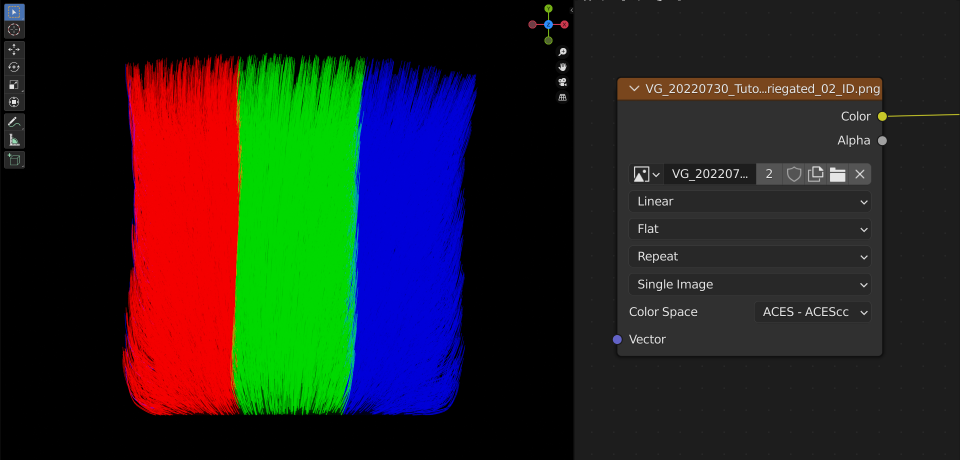
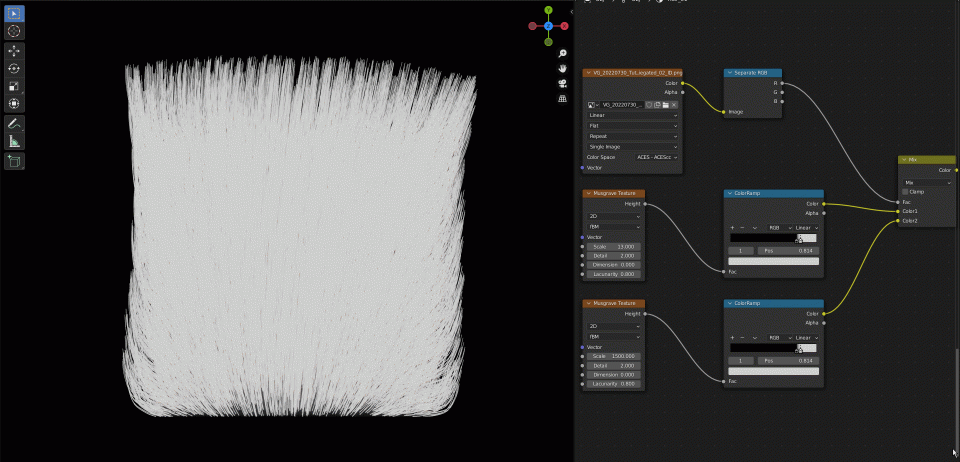
2. Control variegation with an "ID Map". First, create an ID map based on the desired effect, separate it into three colors using "Separate RGB" as the "Fac" of "Mix". The blending of multiple variegation textures is also allowed.
Single Hair Variegation:
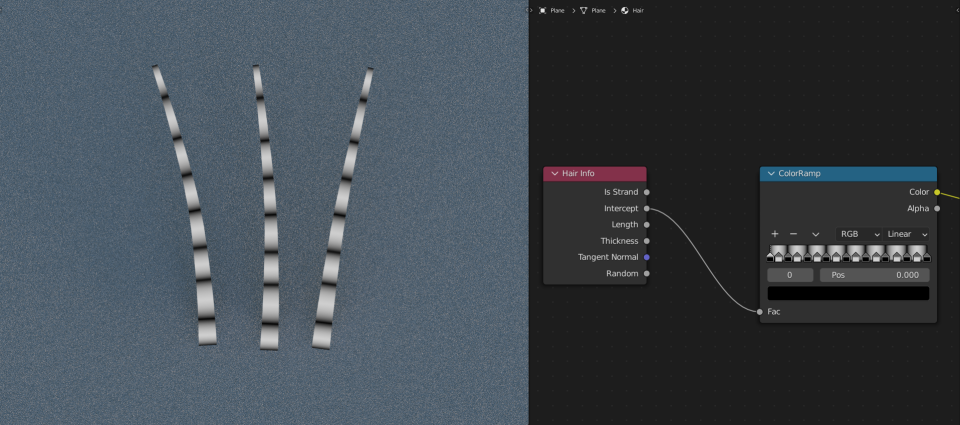
1. Add variegation to hair using the "Intercept" of "Hair Info", and add a "ColorRamp" node to "Intercept", then adjust the color by adding color stops.
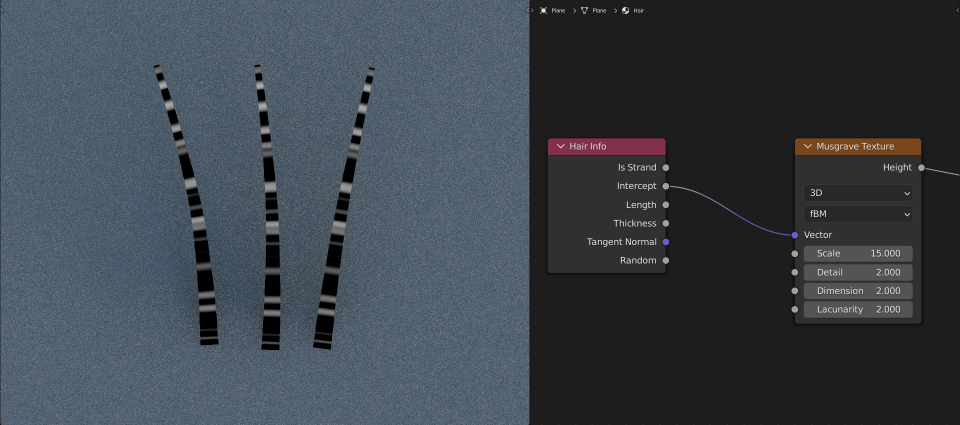
2. Add variegation to hair using the "Intercept" of "Hair Info", and add a "Musgrave Texture" node to "Hair Info". Then connect the "Intercept" of "Hair Info" to the "Vector" of "Musgrave Texture" node, and modify the hair color by adjusting "Scale".
3. Add variegation to hair using the "Object" of "Texture Coordinate", and add a "Musgrave Texture" node to "Texture Coordinate", and connect the "Object" of "Texture Coordinate" to the "Vector" of "Musgrave Texture" node, then modify the hair color by adjusting "Scale".

Case Study:
Take a "Rabbit" as an example, we'll discuss different variegation techniques. Let's start with the basic variegation, the "Single Hair Variegation". Connect the "Intercept" of "Hair Info" to the "Fac" of "ColorRamp" and modify the color of two color stops, mix two different "ColorRamps", and then connect "Random" to "ColorRamp" as the "Fac" of "Mix" and adjust the distance between two color stops to increase contrast, so the two variegation textures can coexist.
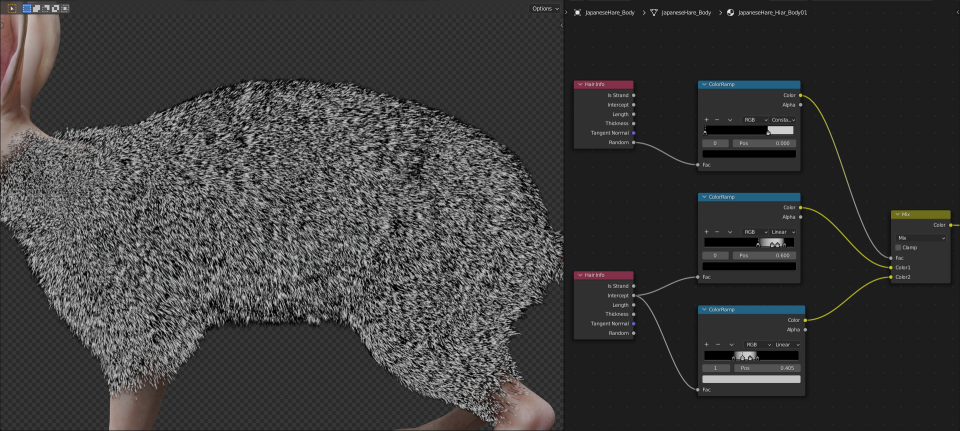
For areas that don't need variegation, use "Random Variegation". Create an ID map to exclude some areas, then convert it to a black and white map with "ColorRamp", and mix it with the previous "Mix", and change the mode to "Multiply" and set "Fac" to 1 to exclude unwanted areas.
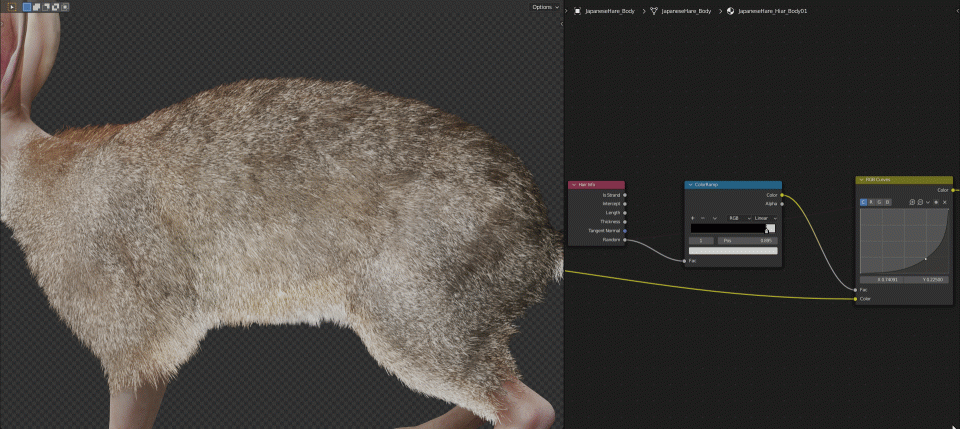
Brighten the color map with "RGB Curves", and connect previously adjusted variegation to "Fac", now the basic variegation is completed.
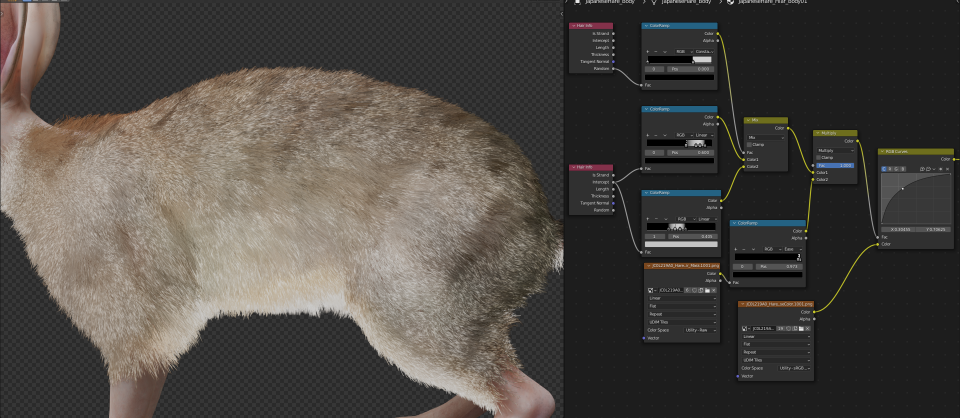
Next, darken the tip colors. Connect the "Intercept" of "Hair Info" to "ColorRamp" to create a mask, then add a "Noise Texture" and connect it to "ColorRamp" to create another mask, and mix both masks, then set the mode to "Multiply", so the tip mask is completed. Darken the color map with "RGB Curves", and connect the tip mask to the "Fac" of "RGB Curves".
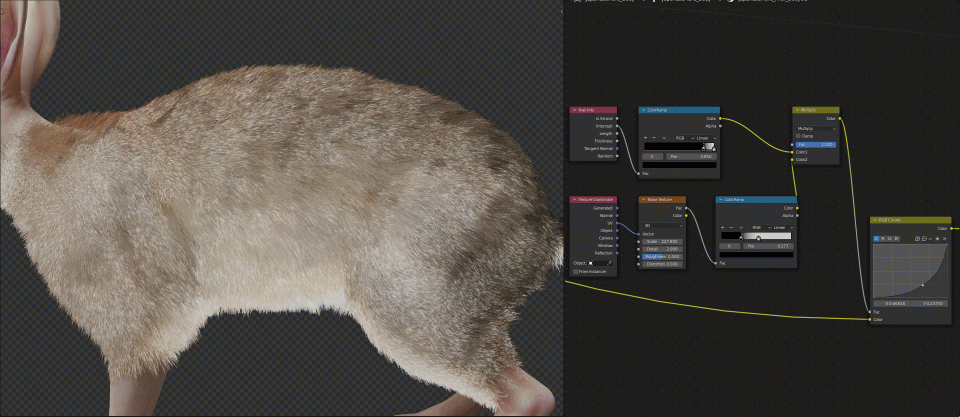
Finally, add some detailed variegation. Connect the "Random" of "Hair Info" to "ColorRamp", and reduce black and increase white to decrease the amount of variegation, then darken the color map with "RGB Curves", and connect the mask to "Fac" to complete the effect.

So glad to have found this, it’s just what I was looking for!
This website has quickly become my go-to source for [topic]. The content is consistently top-notch, covering diverse angles with clarity and expertise. I’m constantly recommending it to colleagues and friends. Keep inspiring us!
of course like your website but you have to check the spelling on several of your posts A number of them are rife with spelling issues and I in finding it very troublesome to inform the reality on the other hand I will certainly come back again
I sincerely admired what you’ve produced here. The sketch is elegant, your written content chic, yet you appear to have developed some anxiety regarding what you aim to offer thereafter. Certainly, I shall return more frequently, just as I have been doing almost constantly, should you uphold this incline.